These are the most commonly used Survey, Layout, and Measuring Tools with tips on using them safely and effectively.
by Jim Schmid
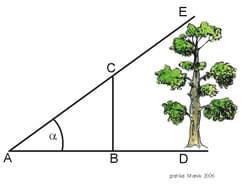
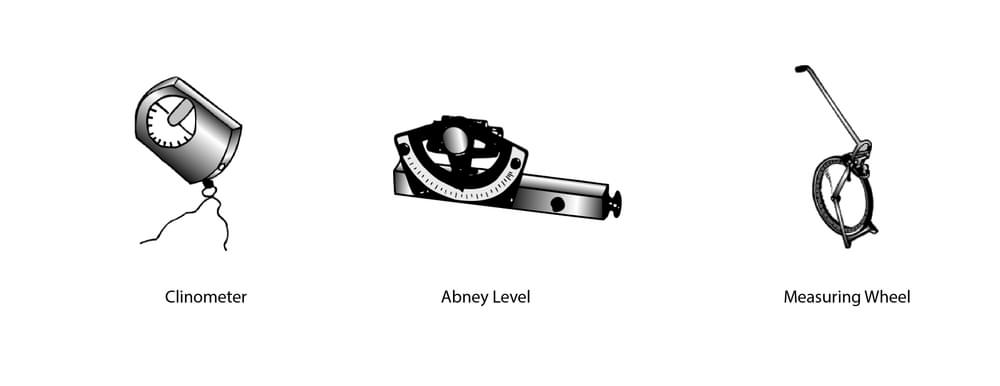
Clinometers are used by trail designers during trail layout to read the percent of grade between two points. It has a floating scale internally from which a grade is measured. A clinometer cannot be set to a fixed grade. Hold the clinometer to your eye and with both eyes open, sight parallel with the ground (upslope or downslope) to a target (stick or someone your own height), aiming at a point on the target that is equal to the height of your eye above the ground. Read directly from the percent scale. Percent slope, the relationship between the amount of elevational rise or drop over a horizonal distance. Expressed as a equation: Percent of Grade = Rise/Run x 100 percent. A section of trail 100 feet long with 10 feet of elevation difference would be a 10 percent grade.
Tip: Both eyes must be kept open when sighting through the clinometer.
This hand-held instrument used since the late 1800s for backcountry surveying. In order to measure or set grade of a trail, set the protractor mounted on the side of the level with the appropriate scale to a fixed gradient. Next, sight through the Abney to a fixed reference (usually another person) until a bubble appears in the crosshair. When the crosshair bisects the bubble, you’ve reached the preset grade on the Abney. The Abney has been replaced in recent decades by the clinometer.
Tip: Check the screw that fixes gradient often to make sure it is still tight and you have the preset grade you want.
Flagging (roll of ribbon or wire flag) comes in a variety of colors and shapes. Flagging is used as a way of highlighting an area for trail alignment, construction, or maintenance. Ribbon or flag color should be chosen so that it is easily identifiable, and does not blend in with the surrounding terrain. All flagging materials should be removed once the areas work is completed.
Tip: Keep in mind that flagging will deteriorate in the elements.
The measuring wheel is used to measure distance on the trail. It records the revolutions of a wheel and hence the distance traveled by the wheel on an existing trail or proposed trail corridor. Measuring wheels can be used to measure distance for guidebook descriptions and also noted in survey or assessment forms to pinpoint the location of work to be done along the trail.
Tip: Be sure counter is set to zero before staring out.
The open reel case is made of lightweight polystyrene and is hi-viz blaze orange or yellow for excellent visibility. The tape measures come in different lengths; no need carrying more than you need. Great for measuring for bridges and other structures.
Tip: Clean the tape as you rewind it to prevent clogging from debris.
GPS, or Global Positioning Satellite, is a constellation of satellites around the earth that can be used to identify and store a position anywhere on the earth. A GPS receiver can be used for gathering waypoints along a proposed trail corridor or existing trail. These points will indicate where to build a trail or points for maintenance. These points can be stored for future reference, and superimposed on an existing map to quickly identify the trail alignment or maintenance areas.
Tip: Carrying extra batteries are always a good idea.
A digital level is useful for determining whether your trail tread is outsloped and to what degree. Professional trailbuilders use the SmartTool Electronic Level, which is available in 2- and 4-foot sizes.
Tip: Be sure to check your calibration on a regular basis to keep you digital Level reading properly.

During his career Jim Schmid served as South Carolina’s first State Trails Coordinator as well as working for the US Forest Service as a Trails Manager in AZ, ID, and FL and also had the pleasure of managing the Florida National Scenic Trail. Jim is a collector at heart. Check out his collection of trail quotes, terms, acronyms, sayings and more at jimstrailresources.wordpress.com. In addition to updating his website and writing book reviews for American Trails Jim enjoys traveling around the country riding rail-trails and mtn bike trails.
Contact: [email protected]
posted Sep 11, 2023
The tools shown here are those used most often by Forest Service trail crews. They are categorized into tools for sawing, chopping, grubbing, digging and tamping, pounding, and hammering, lifting and hauling, peeling and shaping, and sharpening and rehandling. Each tool is described along with helpful techniques for use and maintenance.
Tools for Trails: Measuring and Surveying Tools
posted Nov 8, 2022
Before trail builders start digging, they first have to lay the trail, flag the line, and more to ensure a grade that not only matches the terrain but also is well throughout to prevent erosion.
posted Aug 8, 2022
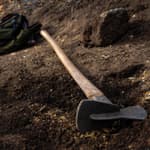
Let’s talk about grubbing and raking tools! You might have heard the term grubbing before, but if you’re new to trail building, it may be unfamiliar. Grubbing is when you are removing earth and topsoil. Basically digging into the first while removing vegetation in the process. Trail builders may also call this process hogging.
posted Jun 8, 2022
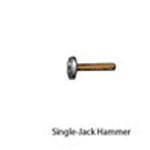
There are a few options for striking tools that you may see out on a project. Some like the sledge hammer will be seen more, while others may only be pulled out for special projects.
5,381 views • posted 04/13/2018