When you construct or reroute a trail, you are putting a structure on the landscape that will be there, in good or bad condition, for 100 years or more in most places. So why not do it right?
by John Favro, Trails Consultant and American Trails Board Chair, TrailsGuy, LLC Trails Consulting
I grew up in a trail culture that said “do the clearing, fill in the holes and ruts, and, if you have erosion, throw in some log water bars.” During my first years of doing trail maintenance, that is exactly what I did. Going back and looking at some of my early trail work, I have come to the conclusion that most of the early work I did was not sustainable nor was it good for the trail, the users and the environment. Why is that?
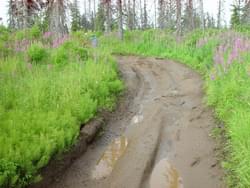
The biggest issue with all trails (yes, even desert trails!) is how the trail affects water flow and how the trail is affected by water. Trails can affect water flow by diverting drainages, collecting sheet runoff, and collecting water in low areas. Water can affect trails through wet areas (bogs), sheet runoff, or drainages. Trails deal with water flow in different ways: by design, by structures, by location.
The philosophy I have come to use when building or rebuilding trails is that it is always better to put trails or reroutes in the proper location. I will discuss proper trail location later in this article. When you construct or reroute a trail, you are putting a structure on the landscape that will be there, in good or bad condition, for 100 years or more in most places. So why not do it right?
Many trails managers balk at the thought of spending extra money up front to properly locate and build a trail. These managers will cringe at a high onetime reconstruction or construction cost but end up paying high maintenance costs for 100 years or more!
Which is cheaper, a moderate or high onetime cost or a smaller cost that ends up recurring 100 times or more? The math is obvious, it is almost always cheaper to opt for the onetime higher cost for new construction or reroutes than to have to pay crews to construct structures and do heavy maintenance for the next 100 years. We all know how hard it is to get trail maintenance funding. In these times of low trail budgets mangers may not maintain a trail for a long time and, when it becomes impassable, spend money for a reroute or a new trail. The result of this will be two scars on the landscape or the need to spend even more money to rehabilitate the old trail. To me it is always best to follow the old saying: “Do it right the first time.”
So, let’s get down to basics on reconstructing or rerouting a trail. There are three basic rules I have for when I begin laying out a trail:
1. Find what the sustainable grade should be.
2. Locate the trail on a sideslope, never on flat ground.
3. Follow a curvilinear alignment.
Some people will tell you that a sustainable grade will always be less than a specific number, say 10% or 20%. They base this grade number on their past experience for an area and may even be correct some of the time. The reality is that every trail is different. Trails may have different uses, vegetation, and soils, even in the same area.
It is much better to determine a sustainable grade for the specific trail you are going to build by looking at the existing trail or, if you are building a new trail, find a trail that has matching characteristics. Then you need to become a trail detective and look at segments of the existing or similar trails and determine, using your clinometer, at what grade the trail begins to erode. Look for where water runs down the trail; any place where there is or has been soil movement on the tread where small ruts are visible. Next determine the grade where that this is occurring at. What I usually do is then deduct from 2% to 4% from that grade and that becomes my sustainable grade for that trail.
What that means is that, unless the soil, runoff or vegetation changes dramatically, I should not have any grade greater than that sustainable grade. This is a key to building a sustainable trail.
The out slope is the percent of slope measured along the width of the trail across (or 90 degrees to) the trail direction of travel. Every trail, unless it is perfectly flat with no side hill or grade, will have sheet runoff hitting it from above. If this sheet runoff is not allowed to cross the trail and continue down the slope, it will turn and go down the trail instead, causing erosion.
The way to prevent this is to provide adequate trail out slope. So what is adequate out slope for a trail? I used to believe that 1% or 2% is adequate. I have since discovered that this is not adequate for most trails. Trail Managers, more in the know than I, now say that the out slope must be greater than the grade of the trail.
When you think of this using physics, it makes sense. Water will always take the steeper, easier route downhill and so, if a trail has a 10% grade with a 8% out slope, a good portion of the sheet runoff will turn and go down the trail which will cause erosion issues.
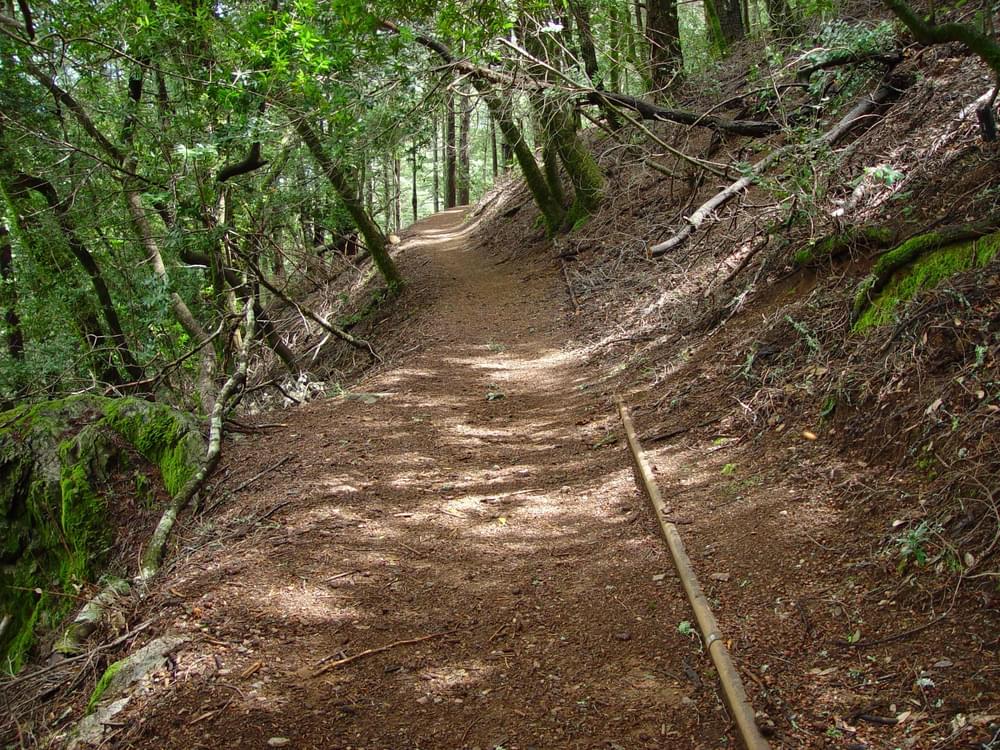
Often you see a trail traversing completely flat terrain. This is usually done because it is easier to build a trail on flat ground than on a side hill where the builder must cut a bench into the hill. Flat terrain is not the place to build a trail. Water will collect in the lowest places and will cause wet areas or erosion leading to these low areas. Both of these events will cause your trail to deteriorate. The place to locate a trail is on a side hill. Sure it may take a little more work but, in the long run, you will have a much more sustainable trail that allows the water to sheet across the trail and will require minimal maintenance.
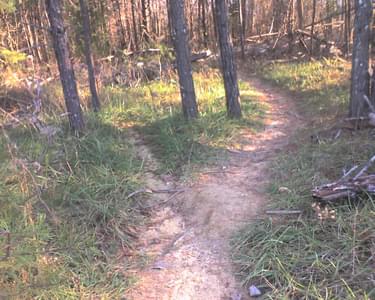
Another thing that should be considered when building a new trail or reroute, is to follow a curvilinear route that matches the terrain. Where there are drainages the trail should dip into them and out of them so that the drainage will flow across the trail and not turn and follow the trail. This is obvious but often trails are built on a straight grade of a certain percent (like some roads). This is contrary to the lay of the land and will result in the trail becoming a route for water instead of the existing drainages.
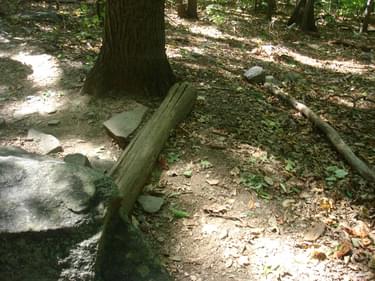
A well built, well located trail will not have need for very many structures except, of course, bridges or retaining walls. Every time a structure is built, the trail manager is taking on a maintenance expense for the life of the trail so it is important to minimize the number of structures you construct. It is especially important to limit the number of drainage structures. Drainage dips or grade reversals are, for the most part, self sustaining and require minimal maintenance. Drainage dips are my first choice if I must put in a drainage structure.
My second choice is usually installing rock waterbars. If rock waterbars are installed properly, they will last a long time but will require more maintenance than a drainage dip. My last choice (which used to be my first choice in the “old days”) is to install a log waterbar. I would only do this if I am not able to properly locate and build the trail and there are no rocks available (this may be the case because of management or enviromental restrictions). These conditions will be very rare. Log waterbars (even using treated logs) are hard to maintain and will eventually rot requiring many replacements at great expense over a 100 year trail life. They are also more prone to being kicked out of place or failing.
So remember! Do it right the first time!

John Favro retired from the Forest Service as Regional Trails Coordinator for the Northern Region of the Forest Service, managing 25,000 miles of trails. John has been in the trails business for 40 years.
Contact: [email protected]
Ice Age National Scenic Trail: Trail Stewardship Notebook
posted Mar 27, 2024
The Ice Age National Scenic Trail (NST) is a thousand-mile footpath highlighting Wisconsin’s renowned Ice Age heritage and scenic beauty. The Ice Age Trail Alliance (IATA) and its partners can shape users’ experiences. As stewards of the land and the Trail, we can help users develop a connection with the land and create a sense of wonder — even pique their curiosity enough to further explore the Trail.
Outdoor Enthusiasts Enjoy the Vermont Shorelines Thanks to the GEOWEB® Soil Confinement System
posted Mar 26, 2024
Outdoor enthusiasts enjoy scenic views along the Vermont shorelines thanks to the GEOWEB® Soil Confinement System.
posted Nov 25, 2023
This white paper provides collected best practices on winter bikeway maintenance as seen in US cities and around the world. The paper covers snow removal from bikeways, different types of de-icing surface applications and their advantages/disadvantages, and best practices for winter maintenance prioritization and scheduling. The paper also includes a brief discussion on innovative winter maintenance techniques either in use or in development.
Winter Maintenance Resource Guide
posted Nov 25, 2023
Who is responsible for winter maintenance—property owners or government agencies—and what are the challenges?
9,189 views • posted 01/03/2018